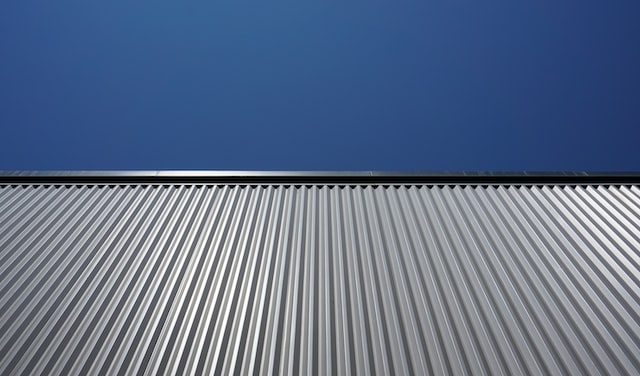
How to Seal a Metal Roof Valley: What’s Actually Involved
The valley is where two roof slopes meet, and on a metal roof it’s the single hardest detail to get right. Water funnels down it. Wind drives rain sideways through it. Hail hits it with the same force it hits everything else, but the valley has nowhere to send the impact. If a metal roof leaks, the valley is usually where it starts. This piece covers what sealing one actually involves, whether you’re going to touch it yourself or hand it to a roofer.
Why a Metal Roof Valley Has to Be Sealed
A valley sees more water in a single storm than the rest of the roof sees in a month. On a Texas roof, that water comes with hail, wind-driven rain off the Gulf, and summer heat that bakes every joint open and shut on a daily cycle. A valley that isn’t sealed correctly fails three ways:
- Water gets under the panels because the underlayment doesn’t extend far enough up either slope.
- Fasteners pierce the valley center where water actually flows, and the holes wick water in.
- The valley-to-wall transition (where a valley meets a chimney, dormer, or sidewall) leaves a gap that no amount of surface sealant fixes.
A properly sealed valley handles all three. The next sections walk through how that works.
Open vs. Closed Valleys: How They Change the Sealing Job
There are two ways to detail a metal roof valley, and the choice changes what sealing means.
An open valley runs a piece of metal flashing down the valley line and leaves it exposed. The roof panels stop a few inches off either side, and water runs down the metal trough. This is the standard approach for standing seam and most exposed-fastener metal roofs. It’s the more durable option in heavy precipitation, the more visible one (the metal trough shows from the ground), and the one that handles hail better because the impact lands on the flashing instead of on a panel edge.
A closed valley runs the panels straight across the valley and laps them over each other, hiding the metal. It’s cleaner-looking but harder to seal correctly because there’s no trough to carry water and the laps have to do all the work. We rarely recommend a closed valley on a Texas roof. The Gulf-coast wind pattern and our hail seasons both favor the open detail.
If you have an open valley, the sealing work happens at the edges where the panels meet the flashing. If you have a closed valley, the sealing work happens at the panel laps and there’s nothing visible to inspect from the ground. That’s the first thing to know before you go up there.
The Layers That Actually Do the Sealing
A sealed valley isn’t one thing, it’s four layers stacked correctly. Each one does a job no other layer can.
- The roof deck. Plywood or OSB, clean and dry, no soft spots. If the deck is rotten under the valley, every other layer fails no matter how well it’s installed.
- The underlayment. Self-adhered bituminous membrane (peel-and-stick) goes directly on the deck along the full valley line. Per the Building America Solution Center guidance from PNNL, the membrane should overlap by 6 inches between sections, applied from the lowest point upward. Where the valley meets a chimney, dormer, or sidewall, the underlayment runs at least 8 inches up the vertical surface. Hurricane-zone programs like IBHS FORTIFIED Roof, ENERGY STAR New Homes, and DOE Zero Energy Ready Home all apply the same sealed-deck approach in coastal Texas construction.
- The valley flashing. A continuous piece of metal (W-pan or V-pan profile) running the length of the valley, lapped 6 inches at each section, sitting on top of the underlayment. The flashing is the trough water actually rides down.
- The panel terminations. Where the roof panels meet the valley flashing, offset cleats hold the panel edges down. Cleats are typically pre-drilled at 4-inch intervals so they anchor cleanly. Per the same PNNL guidance, fasteners should stay at least 6 inches off the valley center in heavy-precipitation conditions; in drier areas 4 inches is acceptable. The closer a fastener gets to the valley center, the more likely it is to wick water.
If any one of those layers is missing or installed wrong, the others can’t compensate.
Choosing the Right Sealant for the Right Joint
There are four sealant chemistries that show up on metal roof valleys, and they’re not interchangeable. Each one fits a specific joint.
| Sealant | Where it goes | Relative durability |
|---|---|---|
| Butyl tape | Panel-to-panel laps, panel-to-flashing edges (compression joints under fasteners) | Long-lived in compression, the workhorse for hidden joints |
| Polyurethane | Exposed terminations, edge metal, high-movement joints | Long-lived in UV and heat; paintable; flexible enough to handle thermal cycling |
| Silicone | Exposed flashing-to-wall transitions, penetrations | Long-lived UV resistance; not paintable; bonds well to metal |
| Acrylic | Touch-up only on hairline issues | Shortest-lived of the four; not a primary sealant for valleys |
The mistake most homeowners (and some roofers) make is using one sealant everywhere. Butyl under a fastener and polyurethane at the wall transition are doing two different jobs. A single tube of silicone can’t do both well.
Where Things Go Wrong (and Why Over-Sealing Is a Red Flag)
If you’re standing on the ground looking up at your valley and you see a heavy bead of caulk or sealant running down the open valley center, that’s almost always a bad sign, not a good one. Sealant doesn’t fix a valley. It hides one.
Here’s what we usually find when we open up an over-sealed valley:
- The flashing was cut short, and someone tried to bridge the gap with sealant instead of installing a proper piece.
- Fasteners were placed too close to the valley center, started leaking, and someone smeared sealant on top of the heads.
- The underlayment never made it up the wall transition, and the valley-to-wall corner is held together with sealant alone.
- The roof panels were trimmed past the flashing edge, exposing the underlayment, and sealant is filling the gap.
In every case, the sealant is masking a flashing detail that wasn’t done correctly. Worse, that sealant traps water behind it. So instead of running off, the water sits against the deck until it finds the next weak spot.
A Quick Check for Texas Homeowners: Is My Valley Sealed Right?
You can run a basic visual inspection from the ground or a sturdy ladder, no roof access needed. Five questions:
- Can you see a clean, unbroken line of metal flashing running the full length of the valley? A continuous metal trough is what you want. Breaks, gaps, or patched sections are not.
- Is there a heavy bead of sealant running down the valley center? If yes, that’s a red flag. The valley flashing should be doing the work, not the sealant.
- Where the valley meets a chimney, dormer, or sidewall, can you see flashing running up the vertical surface for at least a few inches? Per the PNNL guidance, that vertical run should be at least 8 inches. If you can’t see flashing running up at all, the wall transition is suspect.
- Have you had any leak inside the house anywhere near a valley in the last 12 months? A wet ceiling stain, a damp attic spot, drywall discoloration. If yes, the valley is the first place to look regardless of what the rest of this list shows.
- When was the last hailstorm or named storm strong enough to leave dents on metal in your area? If it’s been under 6 months, schedule a closer look. Texas hail seasons reset the clock on every roof inspection.
If the answers don’t all line up, it’s worth getting a real set of eyes on the roof. Get a free, no-pressure photo report from Presidio Roofing’s San Antonio team and we’ll come out, climb the roof, and send you the pictures with notes.
When You Can DIY It and When to Call a Roofer
A homeowner can reasonably handle:
- Visual inspection from the ground or a stable ladder.
- A small sealant touch-up at an exposed termination if the underlying flashing is intact.
- Clearing leaves, branches, or debris out of an open valley.
What needs a pro:
- Anything involving lifting or replacing a panel.
- Re-sealing a wall, dormer, or chimney transition.
- Repairing a valley after hail damage, even if the roof “looks fine” from the ground.
- Cutting or refitting valley flashing.
The rule we use: if the work involves disturbing the panel edge or the flashing layer, it’s pro work. If it stays on the surface and the surface itself is sound, a homeowner can usually handle it. We’re a GAF Master Elite contractor, so when we show up the warranty backing matches the work; that’s not true of every roofer.
Maintenance: How Often a Sealed Valley Needs a Look
A sealed valley is worth a look once a year as a baseline. In Texas, that means add an inspection any time a hailstorm or named storm passes through, regardless of whether the rest of the roof looks fine. Spring is the right cadence for the annual check, since that’s when winter freeze-thaw cycles and early hail season have already had their say. If you’ve gone two springs without anyone on the roof, you’re past due.
If your roof is already on us, a Presidio team will run the seasonal valley check as part of the standard inspection. Want a real set of eyes on it? Get a free photo report.

About the Author
Certifications & Affiliations