
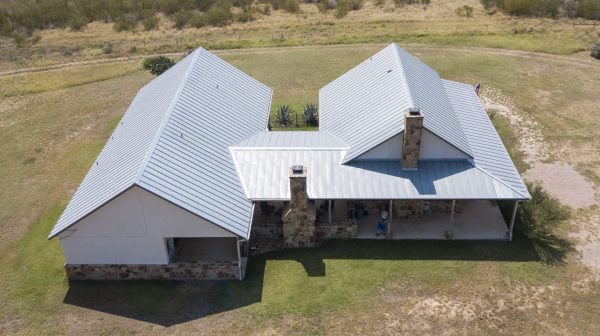
Furring strips look like nothing: thin pieces of wood with no obvious job. Slide one between two surfaces and the small air gap underneath starts doing real work, from ventilation and drainage to insulation and a flat install surface over an uneven deck. On a Texas metal roof, that gap is how we keep heat out of the attic and condensation off the deck.
The most common uses for furring strips
Furring strips show up in more places than just under a metal roof:
- Roofing. Under metal panels to create a ventilated gap. Under tile to bear the load. Over old shingles on a metal-over-shingle retrofit, which is a fast install option when the original asphalt is still structurally sound.
- Walls. Across cinder block or unfinished basement walls to give drywall something flat to fasten to.
- Siding. Vertical strips behind siding so water that gets past the cladding can drain instead of pooling against the sheathing.
- Ceilings. Across joists to create a fastening grid for drywall when joist spacing or alignment is off.
- Tub and shower surrounds. Behind backer board when studs aren’t perfectly flush, so finished tile doesn’t sit on a wave.
Walls and ceilings are a general construction tool, but roofing is where the air-gap and leveling work earns its keep, and it’s the application we deal with every week.
What furring strips do under a metal roof
Metal roofs and Texas heat have a complicated relationship. A standing seam panel sitting in direct San Antonio sun, on any roof from Stone Oak to Alamo Heights to the Hill Country, transfers heat through the deck quickly, and without a break between the panel and the deck below, that heat conducts straight into the plywood, into the attic, and through the ceiling.
Furring strips fix that by holding the panel up off the deck. The air gap underneath does three things:
- Convective cooling. Hot air rises and exits at the ridge, turning the gap into a small ventilation channel along the entire roof.
- Condensation control. Metal sweats when warm interior air meets a cold panel surface, which happens fast on a cold night after a humid Texas day. The gap lets that moisture move instead of sitting on the deck.
- A flat install surface. Older decks settle, sag, or warp, so furring strips give us a level plane to fasten to, which keeps panel seams tight.
On a screw-down corrugated panel over an unconditioned attic, skipping the gap is one of the fastest ways to shorten the life of an otherwise long-lasting roof. We see it more than we should.
How far apart to space furring strips on a metal roof
Most metal roof installs land furring strips between 12 and 24 inches apart, and the right number depends on the panel type and the roof’s slope. We apply both rules on every job.
By panel type:
- Corrugated metal panels: up to 16 inches apart. Corrugated is thinner gauge and needs more support.
- Standing seam panels: up to 24 inches apart. Standing seam is one of the stiffest residential metal systems and can span the widest gap.
- Metal shingles: up to 12 inches apart. Smaller pieces, more fastening points, tighter spacing.
By roof slope:
- Low slope, a pitch of 2/12 or less: up to 12 inches apart.
- Moderate slope, a pitch between 2/12 and 4/12: up to 16 inches apart.
- Steep slope, a pitch over 4/12: up to 24 inches apart.
The binding constraint is the tighter of the two, so a standing seam panel on a low-slope roof gets the 12-inch spacing the slope demands, not the 24 the panel could take. Local building codes can override the manufacturer’s recommendation, and we check the code in every market we install in before driving the first screw. At the bottom edge of each slope, a foam closure strip belongs in place of a furring strip so the assembly can still drain and vent.
Materials and sizes: 1×3, 2×4, and pressure-treated
Furring strips are usually wood, in one of two common sizes on roofing jobs:
- 1×3 strips. Lighter, cheaper, easier to lay flat. The pick when the only job is creating an air gap and the deck below is solid, common on standing seam over a healthy plywood deck.
- 2×4 strips. Stronger and deeper, the pick when we need a thicker ventilation channel, when the strips also carry insulation, or when the deck is rough and we need to bridge a wider gap. Standard for hot-roof assemblies, which are roof systems that move the insulation layer above the deck instead of into the attic.
Outdoors, the wood gets wet at some point, so we default to pressure-treated lumber any time the strip is in a position to take repeated moisture, which on a roof is almost always. Standard SPF strips work when the assembly stays dry, but on a tear-off where we don’t fully trust the deck or the flashing history, pressure-treated is the safer call.
Furring strips vs. battens vs. counter-battens
All three terms get used interchangeably in the trade, and they shouldn’t.
| Term | What it does | Where it sits |
|---|---|---|
| Furring strips | Create an air gap or a flat install surface | Anywhere two flat surfaces need separating |
| Battens | Carry the roofing material directly | Horizontal, fastened across the deck, with the roofing material attached to them |
| Counter-battens | Create a ventilated drainage channel under the battens | Vertical, between the deck and the battens |
Battens are load-bearing for the roofing material itself, which is the pattern under clay tile or slate. Counter-battens sit beneath battens to let air and water move along the slope. Furring strips are the catch-all term for the air-gap-and-leveling job, and on most metal roofs we install, the strip is performing the furring job.
A few mistakes we see on metal roof installs
A handful of installer mistakes show up consistently on the metal roofs we tear off and replace:
- Skipping the furring strip along the top and side edges of a slope, which leaves the panel unsupported where wind load is highest.
- Using a furring strip instead of a foam closure at the bottom edge of a slope, which traps water against the deck.
- Losing track of where the strips actually sit once the panels go down, so fasteners miss the strip and hit nothing.
- Letting the strip ride a curve in the deck instead of falling on a flat plane, so the panel above takes the shape of the wave.
None are catastrophic on day one, but they show up as leaks and panel oil-canning a few years in.
When you don’t need furring strips
Not every roof needs them. A screw-down metal panel installed directly over a sealed underlayment on a healthy plywood deck, where the goal is just a watertight cap and the attic is conditioned space, doesn’t need the air gap, because the deck does the work the strip would do.
The same goes for asphalt shingle and concrete tile roofs, where the deck, the underlayment, and the roofing material handle the structural job without a separation layer. For a deeper primer on the direct-install approach, including metal-over-shingle retrofits, MetalRoofingSource’s re-roofing guide walks through it in detail.
The honest version: furring strips matter most on metal roofs over unconditioned attics, on roof-overs where we’re going metal over old shingles, and on decks that need leveling. Outside those scenarios, they’re optional.
Install them yourself or hire a roofer
For a small shed or detached structure, furring strips are a reasonable DIY job. I’d cut a few strips, lay them out at the right spacing, fasten them down, and install the metal on top.
For a primary residence, the math changes. Spacing has to clear the panel manufacturer’s spec and local code at the same time, the fastening pattern has to hit center on every strip, and the flashing at the eaves and ridge has to integrate with the new gap. One missed detail can void the panel warranty and shorten the life of the whole assembly.
If you’re in San Antonio, Austin, Denton, or Flower Mound and you want a sanity check before you commit, get a free roof inspection from our San Antonio team.
Frequently Asked Questions
What should homeowners expect when a contractor seals a metal roof valley?
How do roofing contractors decide between open and closed valleys for metal roofs?
How do professionals choose the right sealants for different parts of a metal roof valley?
What indicates to a property owner that a metal roof valley was sealed incorrectly?
How can a property owner evaluate the condition of a metal roof valley without roof access?
When should building owners hire a professional contractor instead of attempting metal roof valley maintenance?
How do roofing contractors prevent moisture from entering through metal panel fasteners near the valley?

About the author: Nick Van Slyke
Certifications & Affiliations