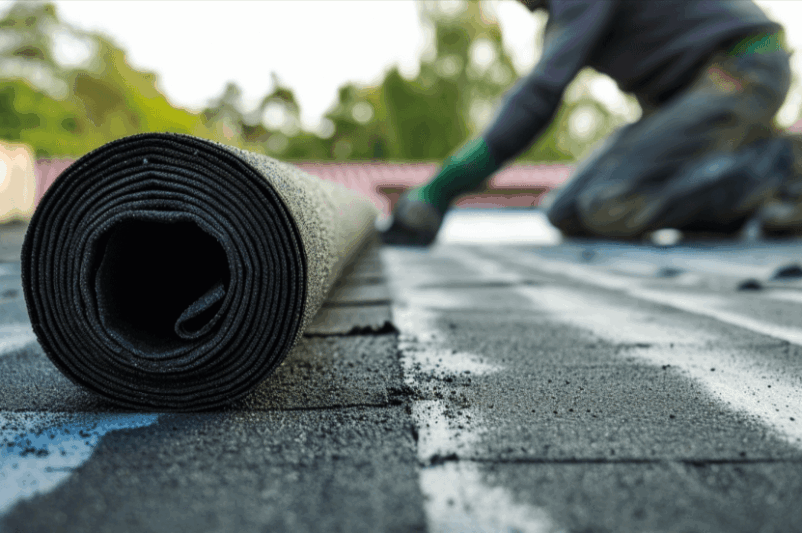
Rolled roofing, often a topic of interest for homeowners and DIY enthusiasts, stands out as a practical and cost-effective roofing solution. Commonly used in various settings, from residential outbuildings to commercial structures, this material offers a blend of simplicity and functionality.
What is Rolled Roofing?
Rolled roofing is a minimalist yet effective roofing material, primarily used for buildings with low-slope roofs. It is made from the same materials as asphalt shingles, including a base of organic felt or fiberglass mat, coated with asphalt and topped with mineral granules. This composition gives it a degree of durability and weather resistance, making it suitable for various roofing needs. The material comes in rolls, typically about 36 inches wide, and is known for its ease of transport and installation.
Types of Rolled Roofing
There are several types of rolled roofing available, each catering to different requirements and preferences. The most common types include:
- Smooth-Finish Rolled Roofing: Often used as an underlayment, this type has a smooth surface and is generally covered with a layer of roofing material like shingles.
- Mineral-Surfaced Rolled Roofing: This type has a granular surface finish, similar to traditional shingles, and is used as the top layer of roofing. It offers better aesthetics and is more durable than the smooth-finish variety.
Each type serves a specific purpose and offers unique benefits, making rolled roofing a versatile choice for a range of roofing projects.
Advantages of Rolled Roofing
Rolled roofing is a popular choice for certain roofing projects due to its unique set of advantages:
- Cost-Effectiveness: One of the most appealing aspects of rolled roofing is its affordability. It is significantly cheaper than traditional shingles and other roofing materials, making it an excellent option for those on a tight budget.
- Ease of Installation: Unlike more complex roofing materials, rolled roofing is relatively easy to install. Its roll-out design allows for quick and straightforward application, which is particularly advantageous for DIY projects or when a rapid roofing solution is needed.
- Versatility: Rolled roofing is not just limited to covering the main roofs of buildings; it’s also commonly used for smaller structures like sheds, garages, and workshops. Additionally, it can serve as an underlayment beneath other roofing materials, providing an extra layer of protection against leaks.
Disadvantages of Rolled Roofing
Like most things, there are also some drawbacks to rolled roofing to consider:
- Durability Concerns: Compared to other roofing materials, rolled roofing generally has a shorter lifespan. Typically, it lasts about 5-10 years, depending on environmental conditions and maintenance, which is shorter than the lifespan of traditional shingles.
- Aesthetic Limitations: Rolled roofing is often viewed as less visually appealing than other roofing options. Its simple, utilitarian appearance may not complement the aesthetic of more elaborately designed homes or buildings.
- Vulnerability to Weather: Rolled roofing can be susceptible to damage from extreme weather conditions. It’s not as resilient to high winds, heavy snow, or intense sun exposure, which can lead to cracking, blistering, or other forms of deterioration over time.
Installation Process
The installation of rolled roofing, while straightforward, involves a series of steps that should be followed carefully to ensure the best outcome:
- Preparation of the Roof Surface: Begin by ensuring that the roof deck is clean, dry, and in good condition. Any damaged areas should be repaired before installing the new roofing.
- Measuring and Cutting the Material: Measure the roof area and cut the rolled roofing material to the required lengths, allowing for an overlap of at least a few inches between each sheet.
- Positioning the First Roll: Start at the bottom edge of the roof and roll out the first sheet, making sure it lies flat and even. Align it carefully to ensure straight and consistent placement.
- Securing the Material: Nail or staple the rolled roofing to the roof deck, starting from one end and working your way to the other. Keep the nails or staples about 6 inches apart along the edges and 12 inches apart in the center of the sheet.
- Applying Roofing Cement at Seams: Once the first sheet is secured, apply a layer of roofing cement along its top edge where the next sheet will overlap. This helps create a waterproof seal.
- Adding Subsequent Rolls: Roll out the next sheet, ensuring it overlaps the first one by a few inches over the area with the roofing cement. Secure it in place with nails or staples, as with the first sheet.
- Sealing the Edges: After all the sheets are laid and secured, apply roofing cement along the edges of the roof and over the nail or staple heads to further waterproof the roof and protect against leaks.
- Final Inspection: Conduct a thorough inspection to ensure that all sheets are securely fastened and the seams are well sealed. Look for any gaps or loose areas that might need additional securing.
Maintenance and Repair
To maximize the lifespan of rolled roofing, regular maintenance and timely repairs are necessary. Periodic inspections, especially after severe weather, can help identify potential issues early. Keeping the roof clean of debris and addressing any signs of wear, such as cracks or blisters, is important.
Rolled roofing can be susceptible to punctures, tears, and wear over time. Small damaged areas can often be repaired with roofing cement and a patch of roofing material. For more extensive damage, larger sections of the roofing may need to be replaced.
Cost Analysis
Understanding the cost of rolled roofing is crucial for homeowners considering this option. The expenses can be broken down into material costs, installation costs, and additional factors that influence the overall price.
- Material Costs:
- Rolled roofing materials typically cost between $0.50 to $1.50 per square foot.
- The average price per roll ranges from $50 to $150, depending on the type and quality. Each roll covers roughly 100 square feet.
- Installation Costs:
- If you opt for DIY installation, the primary costs are the materials and any necessary tools. This approach can significantly reduce overall expenses.
- Professional installation costs vary but generally range from $1.50 to $4.00 per square foot. For a standard 1,200-square-foot roof, this translates to approximately $2,500 to $4,800 in labor costs.
- Additional Expenses:
- Removing and disposing of an existing roof, if necessary, can add $1.00 to $2.00 per square foot to the total cost.
- Other potential costs include roofing cement, sealants, and underlayment materials, which can vary in price.
- Long-Term Costs:
- Rolled roofing, with an average lifespan of 5 to 20 years depending on the material, may require more frequent replacements compared to more durable roofing options.
- Maintenance and repair costs over time should also be factored into the long-term financial considerations.
- Comparative Costs:
- When compared to other roofing materials, rolled roofing is one of the most cost-effective options. For instance, traditional asphalt shingles can cost around $100 to $200 per square (100 square feet), not including installation.
- More durable options like metal roofing range from $120 to $900 per square but offer longer lifespans.
Wrapping Up
Rolled roofing offers a practical and economical solution for certain roofing needs, particularly for low-slope structures and quick installations. While it may not be the most durable or aesthetically pleasing option, its ease of installation and cost-effectiveness make it a viable choice for many situations. As with any roofing material, weighing its pros and cons in relation to your specific needs and circumstances is key to making the right decision.


